

The “No Waste” Four-at-a-Time Flying Geese Calculator
What’s the Math for Four-at-a-Time Flying Geese?
Making Flying Geese four-at-a-time is a breeze, but sometimes the math can be a little tricky. I don’t know what it is about eighths of an inch, but they always make me pause and doubt myself!
To make your geese, you’ll need four smaller squares (which will become the smaller corner triangles of the Flying Geese unit) and one larger square (which will become the larger “middle” triangle of the Flying Geese unit).
Before you start, you’re going to need to know two things:
The Finished size of your Flying Geese (the height and width once it is all sewn together)
Whether you want to be exact or have a little extra fabric to trim down to size
The “Exact” Flying Geese Formula
To calculate the size of your squares, the formulas are:
Small “Corner” Squares = Finished Height + ⅞"
Larger “Middle” Square = Finished Width + 1¼"
The “Oversized” Flying Geese Formula
And if you want a little extra space for trimming, it’s easy:
Small “Corner” Squares = Finished Height + 1⅛"
Larger “Middle” Square = Finished Width + 1½"
One thing to keep in mind, espeically with this “Oversized” version is that you may end up with a tiny “tag” of fabric at the top of the Flying Geese where all three triangles meet. This happens because the construction method and you can easily unpick it to remove it before sewing it into your quilt (it can add an extra two layers of fabric which gets pretty bulky!).
How to Make Four-at-a-Time Flying Geese Step-by-Step
"But, how do I make “No Waste” Flying Geese Four-at-a-Time?" you ask? To start, you are going to need four (4) small squares of fabric (measuring the “Starting Small Square Size in the calculator above) and one (1) large square of fabric (Measuring the “Starting Larger Square Size in the calculator above).
Step 1: Draw a diagonal line on the back of the four small fabric squares.


Step 2: Place (2) Background Fabric squares in opposite corners of (1) Fabric A square (right sides together) and pin in place (the smaller squares will overlap slightly).

Step 3: sew ¼" on either side of the drawn diagonal lines.

Step 4: cut the square in half between the two seams (along the drawn lines) and press.

Step 5: place (1) small fabric square in the open corner of your Step 4 units and pin in place.

Step 6: sew ¼" on either side of the drawn diagonal lines.
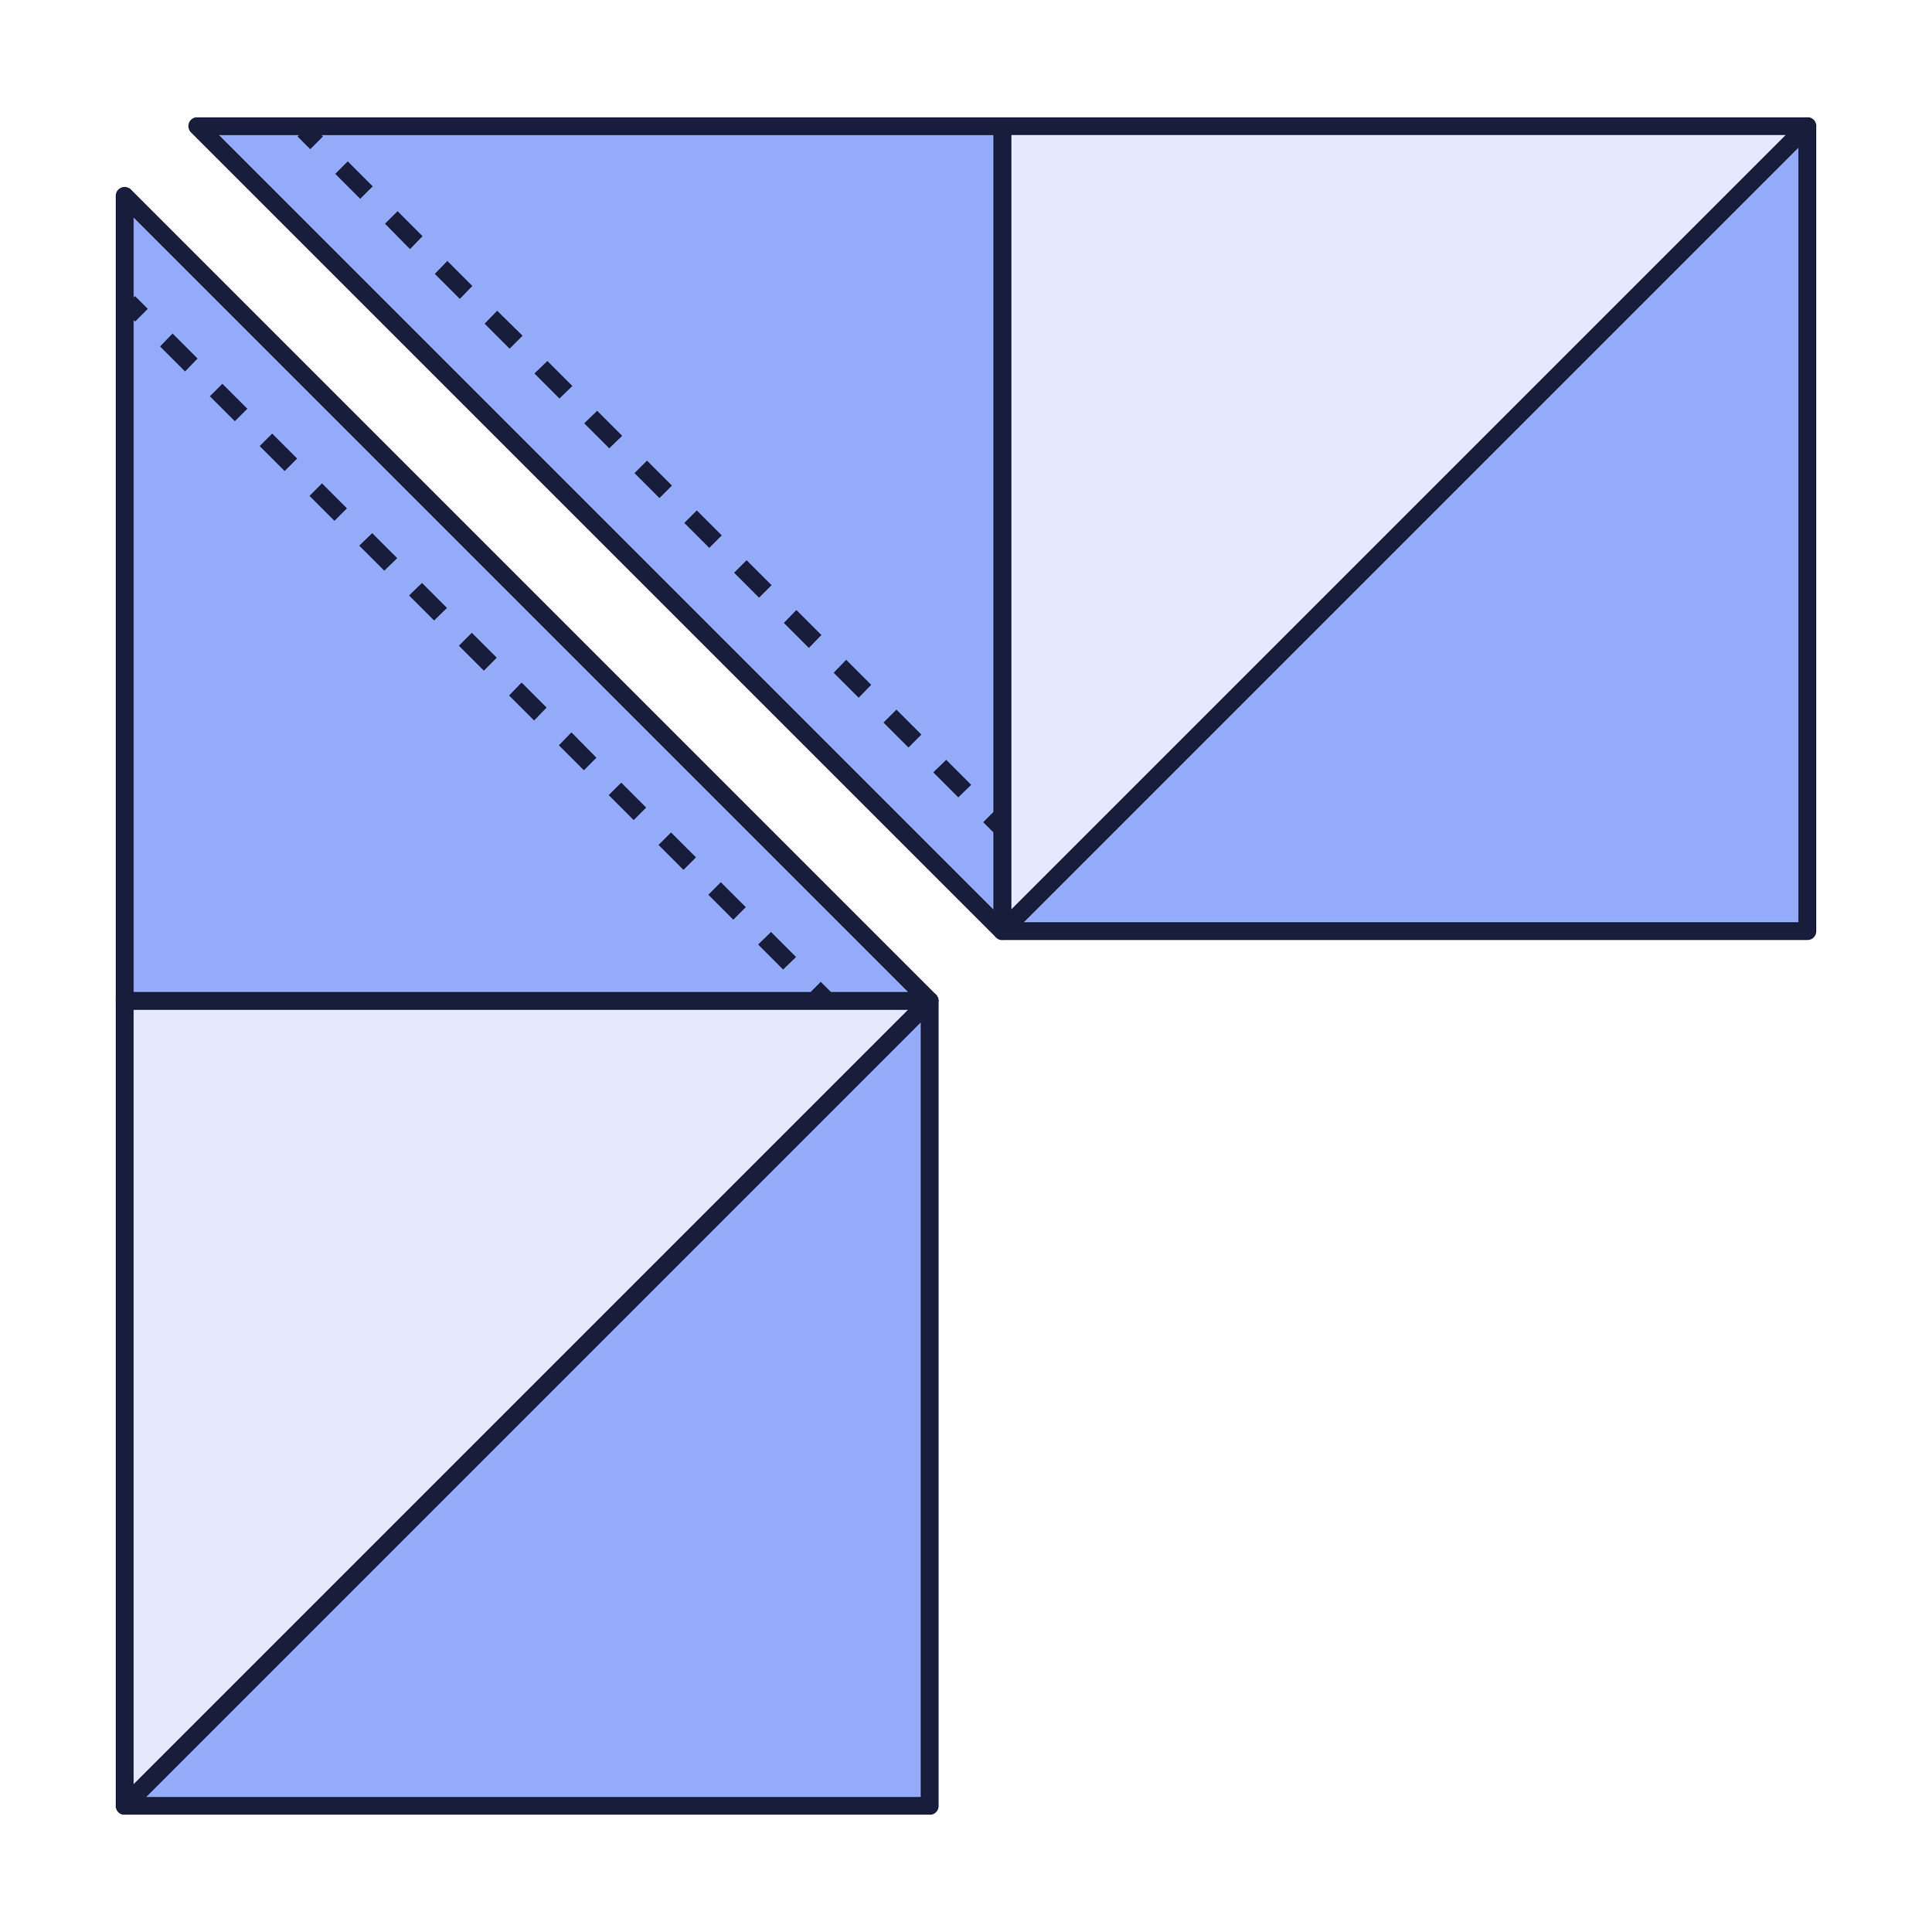
Step 7: cut between the two seams and press open.

Step 7: repeat Steps 5-7 with the second unit, for a total of (4) flying geese.
What About Other Ways to make Flying Geese?
If you’re looking to make Flying Geese units one at a time, you can find the calculator and further info here: