

The Four-at-a-Time Quarter Square Triangles (QST) Calculator
What’s the Math for Four-at-a-Time QSTs?
Here’s a little secret: making quarter square triangles with four fabrics four-at-a-time is the exact same as making them two-at-a-time with two fabrics…the only difference is that you’ll be working with four fabrics instead of two and “doubling” the initial number of squares you’ll be working with. How easy is that?!!
The one thing to keep in mind is that half of the QSTs will be mirror images of each other…not necessarily a bad thing, just something to make a note of.
Before you start, you’re going to need to know two things:
The Finished size of your QST (that’s the dimension once it is all sewn together)
Whether you want to be exact or have a little extra fabric to trim down to size
The “Exact” QST Formula
If you're making QSTs Four-at-a-Time with four different fabrics, you'll need four (4) same-size squares of different fabric. The "official" math (or what I call the in-a-perfect-world-where-I-don't-make-mistakes math) states that you add 1¼" to your desired finished size QST.
Finished QST Size + 1¼" = Starting Square Size
The “Oversized” QST Formula
I always trim my QSTs down to size (and I assume you do too): to factor in a little extra room for trimming, just add 1½" to your finished size and you'll be good to go!
Finished QST Size + 1½" = Starting Square Size
How to Make Four-at-a-Time HSTs Step-by-Step
"But, how do I make QSTs Four-at-at-Time?" you ask? To start, you are going to need four (4) squares of fabric (measuring the “Starting Square Size in the calculator above).
Step 1: Draw a diagonal line on the back of two of your squares
Step 2: pair each marked square with an unmarked square and pin them together, right sides together


Step 3: sew a ¼" on either side of the lines, then cut along the drawn line and press
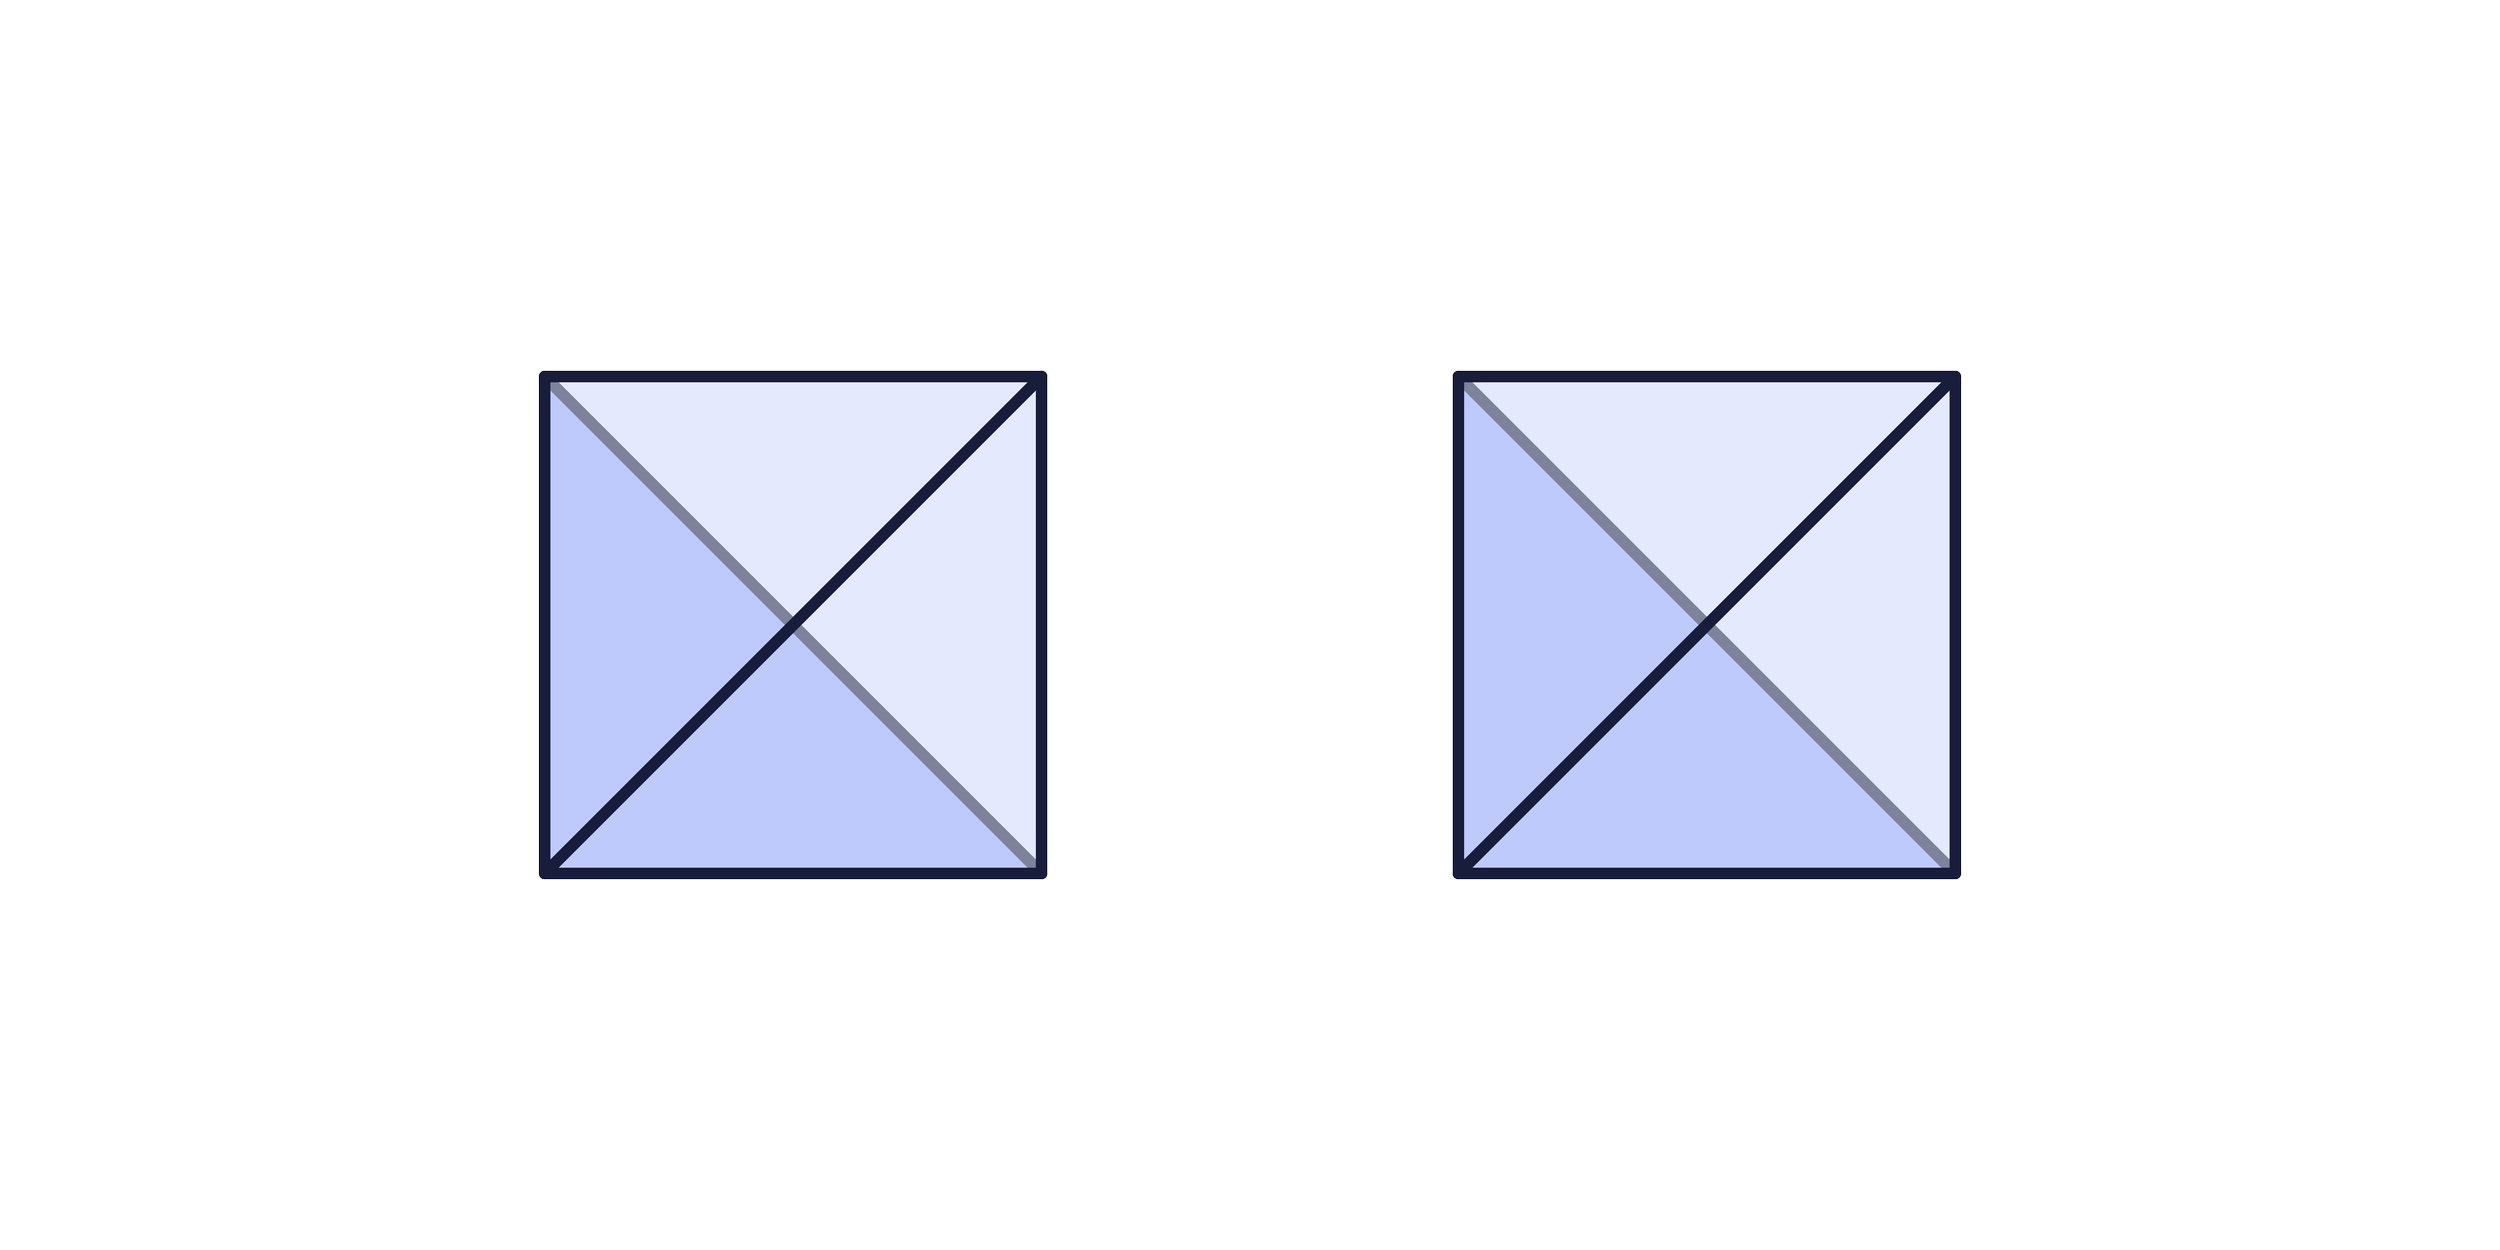
Step 4: on the back of one pair of HSTs, draw a diagonal line perpendicular to the HST diagonal seam
Step 5: place each of the marked HSTs on top of an unmarked HST, right sides together, making sure the HST seams are parallel to each other

Step 6: sew a ¼" on either side of the line then cut along the drawn line

Step 7: press and trim down to size as necessary (to the “Unfinished” size in the calculator above). Note the “mirrored” layout of half the QSTs!

What About Other QST Layouts?
Want to make QSTs with only two fabrics? Easy! Just divide the above recipe by two and start with only two squares of fabric instead of four (and/or make sure to check out the Two-at-a-Time QST Calculator).
Want to make a “Split” QST (it’s a QST/HST hybrid!) with two fabrics or three fabrics? Make sure to check out that calculator as well!